All-On-X cementing Ti bases

RileyS

RileyS

Well-Known Member
Full Member
Messages
2,868
Reaction score
461
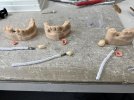
How do you guys cement your Ti Bases ?
This is so stressful each time I do it. I usually quickly get the cement on, put the bases into the appliance then put it on the model and tighten down and light cure. Wondering if you guys have a different technique. I feel I over think and over complicate a lot of stuff
 
Contraluz

Contraluz

Well-Known Member
Donator
Full Member
Messages
1,897
Reaction score
275
This is so stressful each time I do it
Yeah... I agree

I usually check if there are some with the same path of insertion and I would do these first. I like to screw them onto the model and cement them that way, but I would 'dry' screw-in all of them to make sure there is no discrepancy. Then either the rest the same way or one by one, if the path of insertion is way off.

I don't like to put the cement on the abutments, put them in the prosthesis and then put the whole thing on the model and screw it on. I had a couple of them not going on like it should and had to burn the abutments out again, in some cases... Especially fun if you have to ship it out later that day...

I have a good routine by now, but it is aways a time consuming process and sometimes stressful...
 
TheLabGuy

TheLabGuy

Just a Member
Full Member
Messages
6,249
Reaction score
817
Tibases for definitive all-on-x?
 
RileyS

RileyS

Well-Known Member
Full Member
Messages
2,868
Reaction score
461
screw them to the model first, then cement the prosthetic.
That is when they are all multi unit abutments right? I'm definitely not well versed on this stuff but usually my "AOX Mentor" and the doc say go with regular Ti Bases so path of insertion isn't possible 90% of the time. the implants seem to always be buried pretty deep
???
 
CoolHandLuke

CoolHandLuke

Idiot
Full Member
Messages
10,096
Solutions
1
Reaction score
1,411
regular Ti Bases
this is precisely why multiunits exist

everything else is re-engineering the wheel.

they make multiunits for most implants. suggest you brush up on your medentika catalog for example. its called Medentibase abutment, and has ti caps just like 2connect by NT, and is available for almost all platforms in this book


also Dess offers this: https://www.dess-usa.com/multiunit-abutments/ so you can put multiunits on the majority of their platforms too.
 
RileyS

RileyS

Well-Known Member
Full Member
Messages
2,868
Reaction score
461
this is precisely why multiunits exist

everything else is re-engineering the wheel.

they make multiunits for most implants. suggest you brush up on your medentika catalog for example. its called Medentibase abutment, and has ti caps just like 2connect by NT, and is available for almost all platforms in this book


also Dess offers this: https://www.dess-usa.com/multiunit-abutments/ so you can put multiunits on the majority of their platforms too.
Thanks for the links! In this particular all on I have I don’t think any of those would have worked. Implants are extremely deep. I tried a 2 connect years ago on something like this and it was a really good learning experience/embarrassing moment that I didn’t stop to consider there was no way to get those bases sub-g in in continued tissue.
I just tried a multi I found in the tissue model and there’s no way. From the looks the dess and medentika look just as big
 
L

LarryRDC

Active Member
Full Member
Messages
309
Reaction score
59
I use chenille pipe cleaners inserted through the bottom portion of the interfaces and cut them long enough to pull through after pushing them out from the bottom up towards the occlusal screw channel. I use Panavia V5 opaque because it gives a longer working time.
Before mixing and cementing, finish and glaze the tops and pre-fit everything on the models. And mark the the key ways of the Tibase on both the Tibase and the restoration. This helps line up everything when it’s all covered with cement. Then mix and apply on the Tibase chimneys and inside the restoration interface. Insert together and push the pipe cleaner up through the bottom enough to grab and pull all the way out from the occlusal. This will clean out the excess cement. Then seat on the model . Put the screw in and tighten, then make sure it’s seated and properly aligned. Let it cure , chip off excess cement, and clean it up. I’ve done 7- 10 singles at a time. All-on-x are really easy ;) Don’t have to deal wit cleaning the screw channels..the pipe cleaner does it for you! You don’t have worry about parallelism, and everything is seated and cured on the model.. 67621936765__CC875C24-E51E-472B-B748-375C857312CF.jpeg
 
Last edited:
S

Skywalker

Member
Full Member
Messages
28
Reaction score
0
Thanks for the links! In this particular all on I have I don’t think any of those would have worked. Implants are extremely deep. I tried a 2 connect years ago on something like this and it was a really good learning experience/embarrassing moment that I didn’t stop to consider there was no way to get those bases sub-g in in continued tissue.
I just tried a multi I found in the tissue model and there’s no way. From the looks the dess and medentika look just as big
MUA's come in various lengths and you can also have custom MUA's fabricated.
 
RileyS

RileyS

Well-Known Member
Full Member
Messages
2,868
Reaction score
461
I use chenille pipe cleaners inserted through the bottom portion of the interfaces and cut them long enough to pull through after pushing them out from the bottom up towards the occlusal screw channel. I use Panavia V5 opaque because it gives a longer working time.
Before mixing and cementing, finish and glaze the tops and pre-fit everything on the models. And mark the the key ways of the Tibase on both the Tibase and the restoration. This helps line up everything when it’s all covered with cement. Then mix and apply on the Tibase chimneys and inside the restoration interface. Insert together and push the pipe cleaner up through the bottom enough to grab and pull all the way out from the occlusal. This will clean out the excess cement. Then seat on the model . Put the screw in and tighten, then make sure it’s seated and properly aligned. Let it cure , chip off excess cement, and clean it up. I’ve done 7- 10 singles at a time. All-on-x are really easy ;) Don’t have to deal wit cleaning the screw channels..the pipe cleaner does it for you! You don’t have worry about parallelism, and everything is seated and cured on the model.. View attachment 43093
Getting 10 done at once would be awesome for all the singles! I think I’m buying some panavia.
 
RileyS

RileyS

Well-Known Member
Full Member
Messages
2,868
Reaction score
461
MUA's come in various lengths and you can also have custom MUA's fabricated.
I completely forgot I’ve done a custom before. 🤦🏼‍♂️That’ll change my life doing that.
 

Similar threads

millennium
Replies
18
Views
333
millennium
millennium
M
Replies
9
Views
290
DigiSculpt Design Center
Brett Hansen CDT
Replies
23
Views
1K
Toothman19
Toothman19
LabRat23
Replies
5
Views
221
Matt Weigand
M
Hitdabox
Replies
4
Views
705
Brett Hansen CDT
Brett Hansen CDT
Top Bottom