Why did this zirconia fracture? Pics included

  • Thread starter Marcusthegladiator CDT
  • Start date
Marcusthegladiator CDT

Marcusthegladiator CDT

Well-Known Member
Full Member
Messages
3,094
Reaction score
432
Minus pics of the fracture. Too busy.

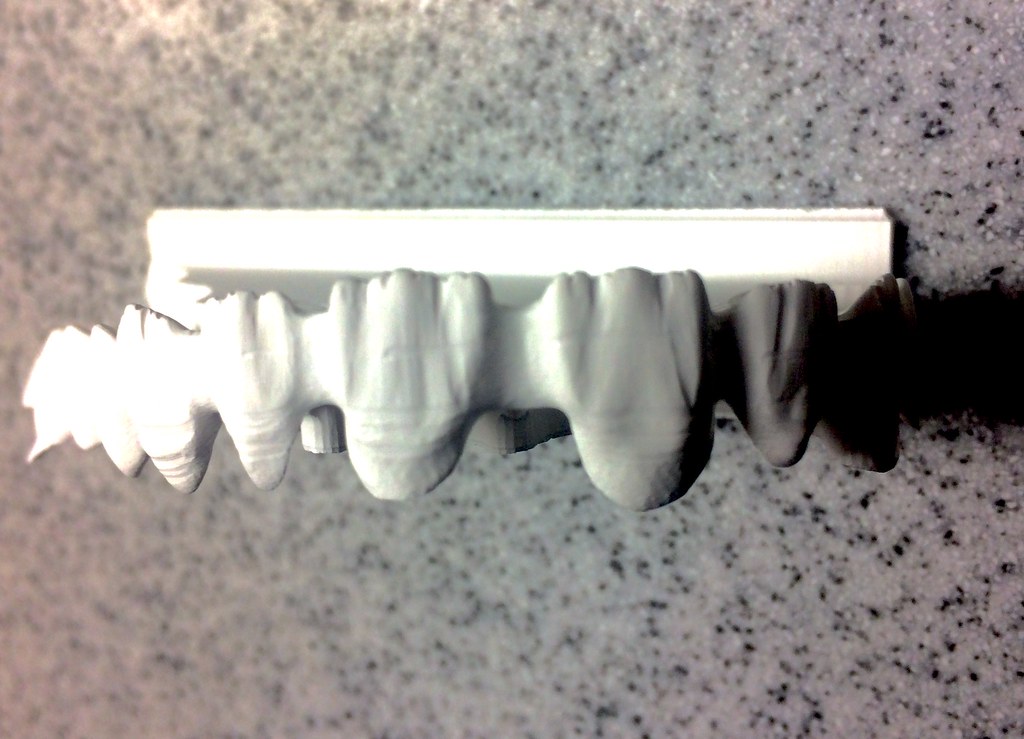
Fractured after sinter, twice.

So I enforced a min thickness of 5.5 as the last step of the design, as always. 2mm width sprues

And the doc prepped a heck of a lot, plenty of buildup.

But after sinter, I had 3 fractures. Two where the sprue met the lingual of a posterior, and the third one was the lingual wall of #8 which was not even sprued.

10C min to 1550, Hold for 2.5 hrs, and cool 6C per minute. Was about 11 hour program.
Katana HT10 22mm

Am I missing something or is this just a cursed case?

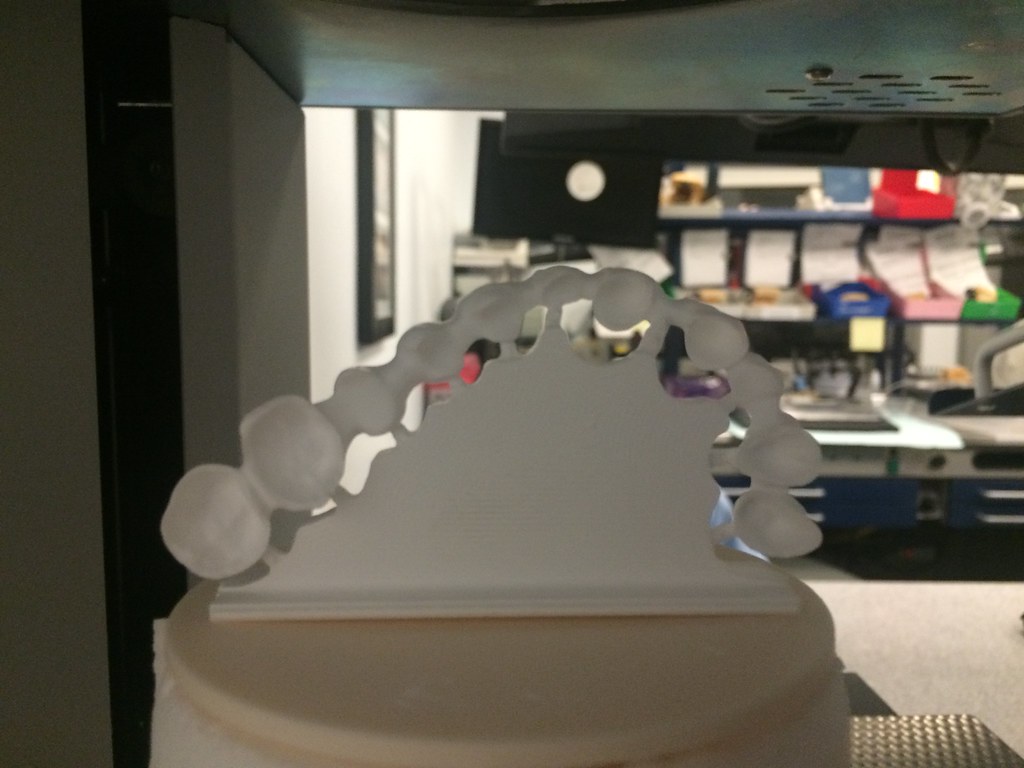
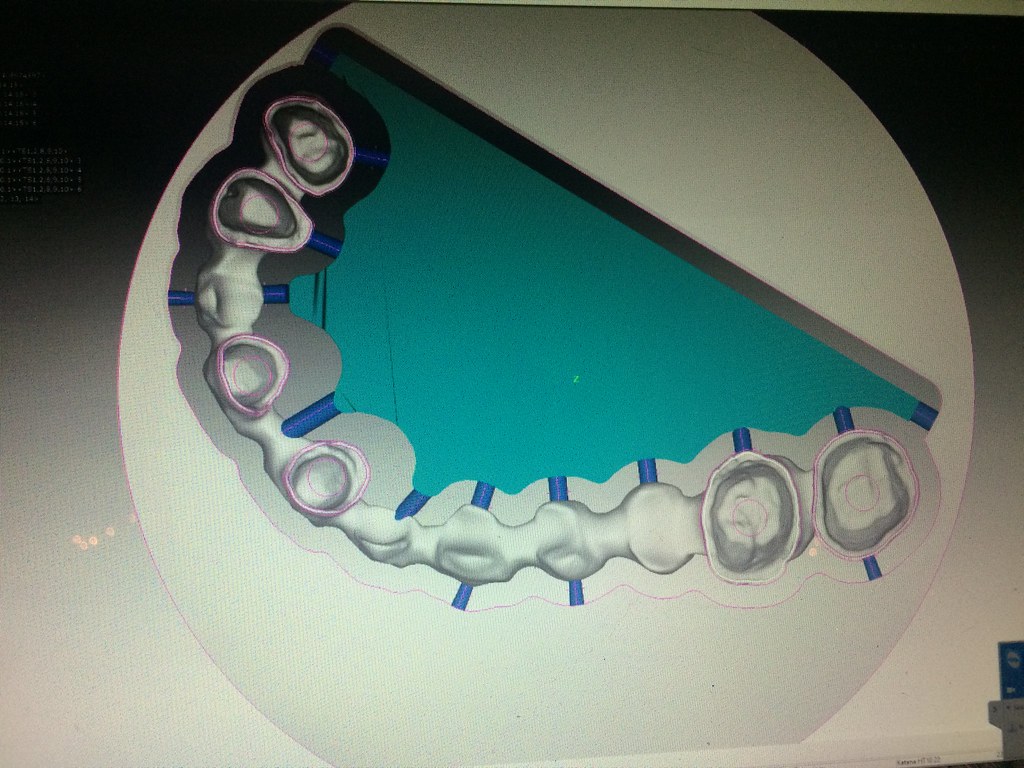
The only thing I didn't like was I was forced to angle the sprues since sum 3ds bar is aligned in the center of the z axis and I can not make it wider. So on the z axis the sprues are angled to reach the center of the z axis.

In the last two photos you can see why I could not angle and cut in a smaller blank. If I angled this bridge, the tools couldn't get past the facial margins of 8,9. So now I have to sprue at an angle... Which I have never had to do to a stabilizer bar.

How say you?

24483211486_113deb00db_b.jpg
24141650309_66bee2f080_b.jpg
24509410435_f8ccaa5f7e_b.jpg

24214197190_efdbb91051_b.jpg
23881567954_48fb220cf7_b.jpg
 
Last edited:
JohnWilson

JohnWilson

Well-Known Member
Full Member
Messages
5,487
Reaction score
1,575
You guys are still doing fully layered restorations? This case there is zero need for it, full contour ling at least on the 6 ant would be a much wiser solution.

A few things I will mention,

1) there is ZERO need to sinter with ALL those bars connected and In my opinion causes more stress. I would cut all but 3 in a triangle fashion. Plush why put more stress to the frame by having to cut all of those bars post sinter

2) I never ever put a bar on a joint either

3) I try and estimate/match the mass of the pattern with the brace

I also sinter my large case horizontal and add a few drops to stabilize the pattern this creates less drag on the sintering plate.
 
CoolHandLuke

CoolHandLuke

Idiot
Full Member
Messages
10,093
Solutions
1
Reaction score
1,411
marcus

think of it this way, the big support is a giant heat-sink like in a computer. you want it to take some heat to help the bridge stay consistent at every point of the process, but in this case it is acting like an actual heat sink, sucking all the thermal energy out of the bridge because there is a lot of contact (sprues) between your bridge and the support bar

fewer sprues is the first thing, i'd reduce it down to about 5. one on each end and three at even spacing between them.

i'm not sure if your mill is a 5axis mill, but you can use 5-axis undercut milling in your template by adding "< UNDERCUT10/10/10 >" with no space. paste it in your Internal finishing stage (between the words INTERNAL FINISHING and < SPIRAL ... > ) , and it will calculate each internal intaglio surface with +/- 10 degrees of 5-axis continuous finishing. this takes a lot longer to do but will let you get a slightly shallower puck. maybe -2 or 3 mils.

check it in the simulation before you mill it and make sure its not tilted too far that the undercut can't reach.
 
Sevan P

Sevan P

Well-Known Member
Full Member
Messages
3,418
Reaction score
641
This was a bridge I did for Aurident as one of their display bridges, sintered just fine on the first shot in a 14 hour cycles. Only sprued on the abutments. Over sprueing can have a negative impact when the Zr is being pulled all sorts of direction, the bigger the arch the move stuff moves around.

14 Unit7.jpg 14 Unit6.jpg 14 Unit2.jpg
 
Mike2

Mike2

Active Member
Full Member
Messages
568
Reaction score
73
I agree with above, that mass in the middle connected to the sprues is creating a lot of stress. My sinter frames that size would have the center hollowed out.
 
Patrick Coon

Patrick Coon

Well-Known Member
Full Member
Messages
1,174
Reaction score
565
Here are our recommendations for sintering supports. The reason for the differences from the BLUE highlights and the GREEN highlights is that in the S1 (GREEN) we recommend standing the units upright on the support base for sintering. This eliminates the need for drops on the occlusion for support. In our Wieland furnaces and other brands we recommend laying down on the tray and using drops.


upload_2016-1-21_8-33-23.png upload_2016-1-21_8-33-51.png
 

Similar threads

Top Bottom