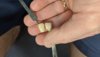
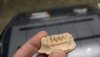
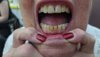
Post a pic and lets start from there.
Don't bother mixing the whole jar,just a small dab and control the viscosity with glaze liquid.
Add storm or smoke or both first, fire, then go back with your shade and glaze.
Keep experimenting.
I love seeing the discussion about MiYO!
MiYO does stand for "Make it Your Own" BUT I will also say there are few very critical factors to insure you get the results we say you should get, so Rob I just want to elaborate on a couple of those critical things that will affect the result, more for the new users on this site as you have a great command of MiYO already:
1) You DO want to mix the entire jar. There will likely be a lot of sediment material "Settled out" in the bottom of your jars and liquid on top when you get them (Happens during shipping) and it's critical to mix it thoroughly before using. If you don't you will get a large variation in results as the top of the jar has more liquid and the bottom has more ceramic. You will most likely not get the "WYSIWYG" or What you see is what you get if you don't mix properly.
2) DON'T add liquid to the jar! Both MiYO Color and Structure come with the proper amount of liquid! Adding liquid to the jar will change handling properties dramatically as well as visual results. If you want to thin something out (And I get that you will at times) remove material that's been thoroughly mixed and add a small amount of InSync Glaze Liquid to your tray, not the jar.
3) DON'T add water to MiYO Colors. This will change the refractive index of the material and it won't be "WYSIWYG". The color will shift during firing...You can clean your brush with water but drag it across a papertowel and wet the brush slightly by picking up a small amount of InSync Glaze Liquid before picking up the material.
4) If you only want a small amount of chroma, color, etc, apply MiYO with fairly heavy brush strokes, like you would a stain.
5) If you want greater color saturation, value shift, etc. use a "Dab and Drag" application. Pick up more MiYO Color on your brush and with the brush nearly parallel to the crown, let the material slide off the brush without actually touching the brush to the crown. MiYO will literally float on top of itself wet, allowing you to actually "Layer" or create some really cool effects.
For those who own MiYO, you have access to a broad library of videos that cover all of these things, as well as live training done through video conferencing so don't be shy!
K